一、安装服务
Jenkins工具下载地址: https://jenkins.io/download/
Jenkins插件下载地址:http://mirror.xmission.com/jenkins/plugins/
具体安装步骤请自行百度,教程很多,这里就不再多说了。
安装完Jenkins后,确保可以正常访问http://localhost:8080/
二、新建任务
1.点击左上角“新建Item”
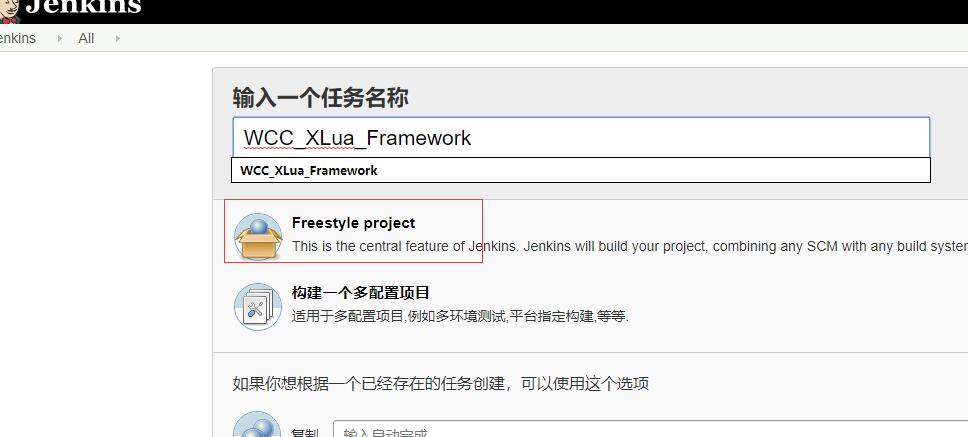
2.添加Git/SVN地址、指定分支
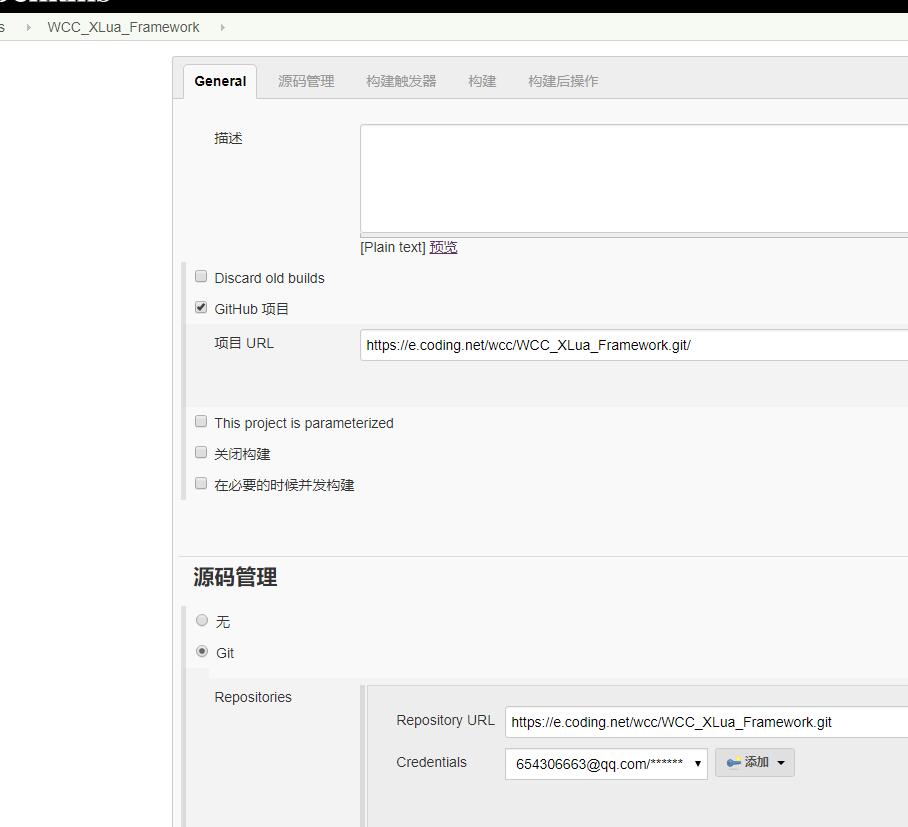
3.点击“保存”按钮
三、通过Jenkins拉取Git\SVN工程
1.进入刚创建的项目里,点击“立即构建”
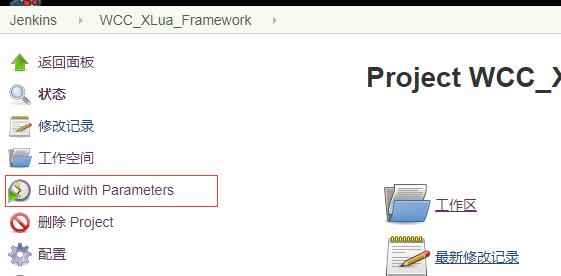
2.等待项目构建完毕(此时我们只有拉取Git工程步骤,所以当拉取完Git工程,即为构建完毕)
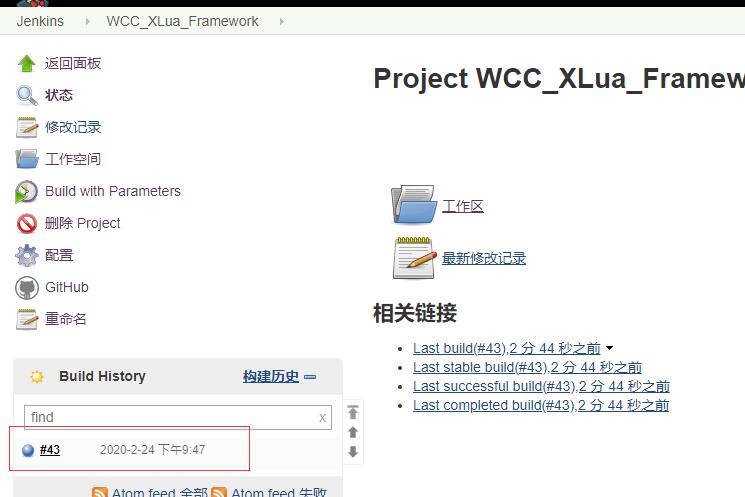
3.查看Jenkins默认工作空间目录,确认成功拉取了工程

四、在Jenkins中添加打包参数
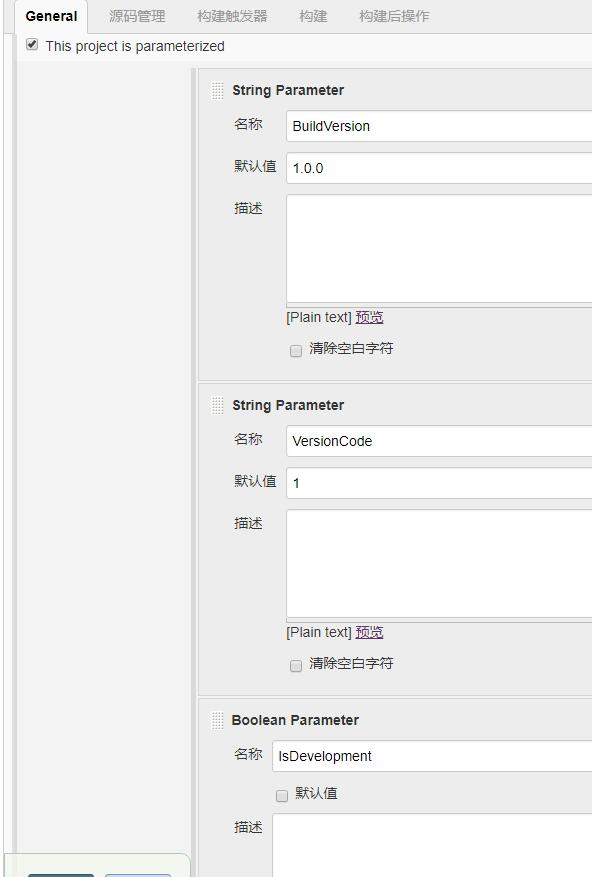
五、编写Python打包脚本,接收打包参数,并调用命令行执行打包

|
1 2 3 4 5 6 7 8 9 10 11 12 13 14 15 16 17 18 19 20 21 22 23 24 25 26 27 28 29 30 31 32 33 34 35 36 37 38 39 40 41 42 43 |
import sys import os import fileinput import subprocess #Jenkins配置教程:http://www.u3d8.com/?p=1996 if __name__ == '__main__': #Jenkins传递 无需手动修改 jenkinsParams = { 'WorkSpace':os.environ['WorkSpace'].strip().replace('\\', '/'), 'BuildVersion':os.environ['BuildVersion'].strip(), 'VersionCode':os.environ['VersionCode'].strip(), 'IsDevelopment':os.environ['IsDevelopment'].strip() } #本地参数 需手动修改 localParams = { 'UnityPath':'C:/Program Files/Unity2019.1.12/2019.3.2f1/Editor/Unity.exe', 'ProjectPath':jenkinsParams['WorkSpace'] + '/Client', 'LogPath':jenkinsParams['WorkSpace'] + '/Client/BuildTools/OutPut/apk_log.txt', } print('Jenkins参数') print(jenkinsParams) print('本地参数') print(localParams) print('开始构建'); #调用BuildEditor.BuildAPK方法 编译APK cmd = '"' + localParams['UnityPath'] + '" -batchmode -projectPath "' + localParams['ProjectPath'] + '" -nographics -executeMethod BuildEditor.BuildAPK -logFile "' + localParams['LogPath'] + '" -quit ' + jenkinsParams['BuildVersion'] + ' ' + jenkinsParams['VersionCode'] + ' ' + jenkinsParams['IsDevelopment']; print(cmd); subprocess.call(cmd); #在Jenkins中打印Log fileHandler = open(localParams['LogPath'], mode='r', encoding='UTF-8') report_lines = fileHandler.readlines() for line in report_lines: print(line.rstrip()) print('结束构建') |
六、在Unity中添加打包脚本
|
1 2 3 4 5 6 7 8 9 10 11 12 13 14 15 16 17 18 19 20 21 22 23 24 25 26 27 28 29 30 31 32 33 34 35 36 37 38 39 40 41 42 43 44 45 46 47 48 49 50 51 52 53 54 55 56 57 58 59 60 61 62 63 |
using System.Collections; using System.Collections.Generic; using UnityEngine; using UnityEditor; using System.IO; using System; public class BuildEditor : MonoBehaviour { private static string GameName = PlayerSettings.productName + "_" + DateTime.Now.ToString("yyyyMMddHHmm"); private static string OutPutPath = System.IO.Directory.GetCurrentDirectory() + "/BuildTools/OutPut/"; private static string ApkPath = string.Format("{0}{1}.apk", OutPutPath, GameName); private static string AndroidProjectPath = string.Format("{0}{1}_AndroidProject", OutPutPath, GameName); [MenuItem("Tools/打包/打包APK")] public static void BuildAPK() { string buildVersion = "1.0.0"; int versionCode = 1; bool isDevelopment = false; Debug.Log("------------- 接收命令行参数 -------------"); List<string> commondList = new List<string>(); foreach (string arg in System.Environment.GetCommandLineArgs()) { Debug.Log("命令行传递过来参数:" + arg); commondList.Add(arg); } try { Debug.Log("命令行传递过来参数数量:" + commondList.Count); buildVersion = commondList[commondList.Count - 3]; versionCode = int.Parse(commondList[commondList.Count - 2]); isDevelopment = bool.Parse(commondList[commondList.Count - 1]); } catch (Exception) { } Debug.Log("------------- 更新资源 -------------"); OneKeyRefreshSource.Create(); Debug.Log("------------- 开始 BuildAPK -------------"); PlayerSettings.bundleVersion = buildVersion; PlayerSettings.Android.bundleVersionCode = versionCode; BuildOptions buildOption = BuildOptions.None; if (isDevelopment) buildOption |= BuildOptions.Development; else buildOption &= BuildOptions.Development; //PlayerSettings.Android.keystorePass = "00000000"; // 密钥密码 //PlayerSettings.Android.keyaliasName = "test.keystore"; // 密钥别名 //PlayerSettings.Android.keyaliasPass = "00000000"; BuildPipeline.BuildPlayer(EditorBuildSettings.scenes, ApkPath, BuildTarget.Android, buildOption); Debug.Log("------------- 结束 BuildAPK -------------"); Debug.Log("Build目录:" + ApkPath); //Application.OpenURL(OutPutPath); } } |
注:在Unity中添加完,可以注释以下三行,然后执行“Tools/打包/打包APK”,以确保在Unity中可以正常打包。否则,检查错误。
|
1 2 3 |
buildVersion = commondList[commondList.Count - 3]; versionCode = int.Parse(commondList[commondList.Count - 2]); isDevelopment = bool.Parse(commondList[commondList.Count - 1]); |
七、在Jenkins中调用Python脚本

|
1 2 |
cd %WORKSPACE%\Client\BuildTools\BuildScript C:\Users\EGLS0715\AppData\Local\Programs\Python\Python38\python.exe BuildAndroid.py |
八、至此,流程完成,可以打包再次测试。
如果编译报错,可参考以下解决方案(因为是调用Unity命令打包,所以在Jenkins的SDK和NDK是不需要配置的)
1.在Jenkins配置SDK环境

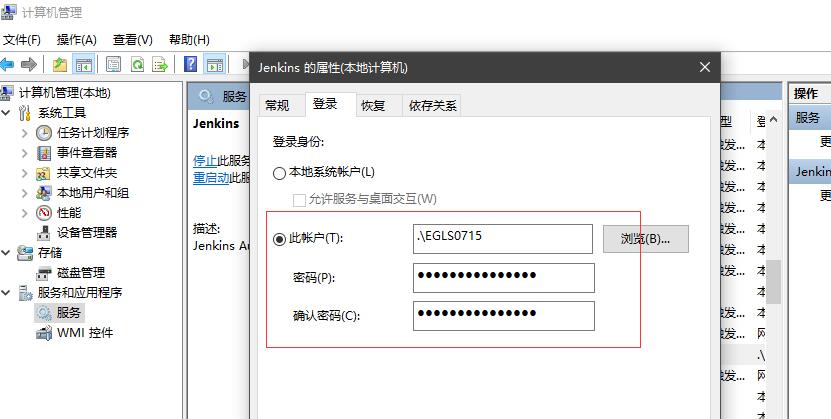
2.在Jenkins配置登录账户。解决因非管理员账号导致Gradle报错
九、Jenkins权限配置
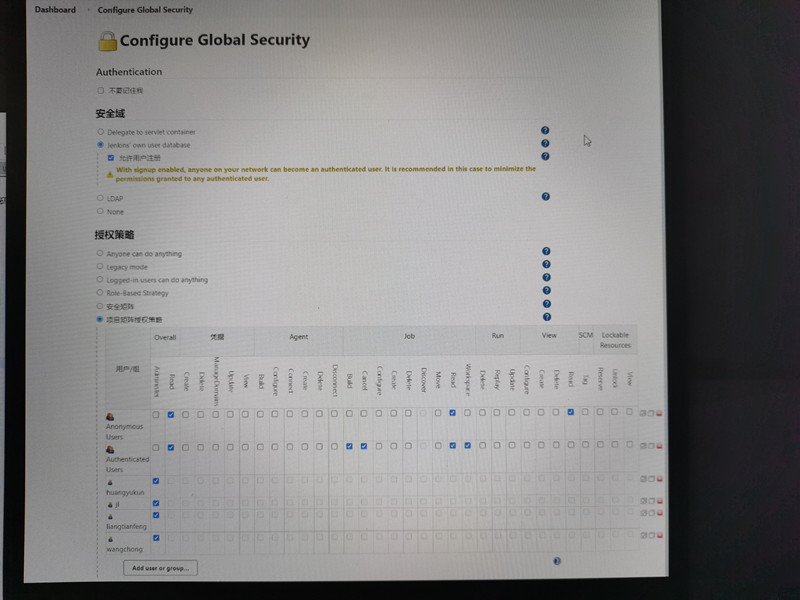
1、不用登陆就可以有View权限
2、自己注册账号登录有Build权限
3、自定义设置某个角色权限
- 本文固定链接: http://www.u3d8.com/?p=1996
- 转载请注明: 网虫虫 在 u3d8.com 发表过
